

Set Up Gmail
Send your site's email through a Google account with Google sign-in: create a Google Cloud project and OAuth client, paste its Client ID and secret, and connect.
The Gmail mailer sends through a Google account with Google sign-in. You do not type your Google password. You create an OAuth client in your own Google Cloud project, paste its Client ID and secret into UiChemy, and approve access once.
It takes about ten minutes. You need a Google account and access to Google Cloud Console.
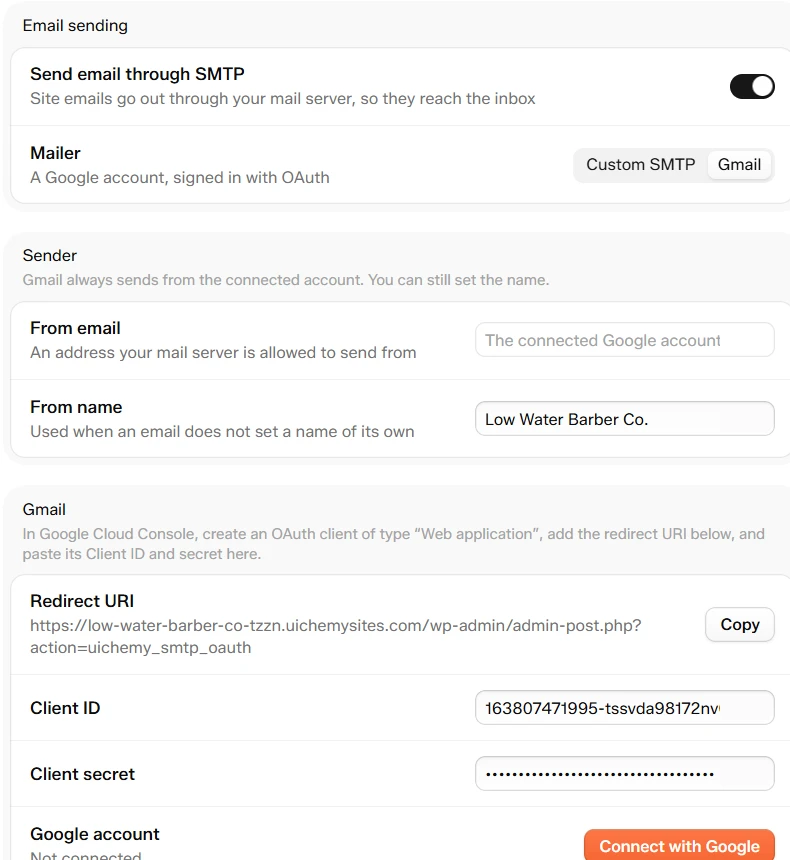
Settings → SMTP with Gmail selected, Client ID and secret filled in
Step 1: Copy the Redirect URI
Choose Gmail
Go to UiChemy → Settings → SMTP, turn on Send email through SMTP, and set Mailer to Gmail.
Copy the Redirect URI
In the Gmail group, click Copy beside Redirect URI. It is a link on your own site that ends in action=uichemy_smtp_oauth. Keep this tab open.
Step 2: Create a Google Cloud Project
Create the project
In Google Cloud Console, create a new project. Any name works, for example "UiChemy SMTP".
Set up Google Auth Platform
Open Google Auth Platform and click Get started. Fill in the four steps: App Information (an app name and your support email), Audience (choose External), Contact Information (your email), and Finish (agree to the Google API Services User Data Policy). Then click Create.
Choose External unless your Google account belongs to a Google Workspace organization. Internal is only available for Workspace.
Step 3: Create the OAuth Client
Create a client
In Google Auth Platform, open Clients and click Create client. Set Application type to Web application and give it a name.
Add the Redirect URI
Under Authorized redirect URIs, click Add URI and paste the Redirect URI you copied from UiChemy. Leave Authorized JavaScript origins empty. Click Create.
Copy the Client ID and secret
Google shows an OAuth client created box with a Client ID and a Client secret. Copy both now. You cannot see the secret again after you close the box, so use Download JSON if you want a copy.
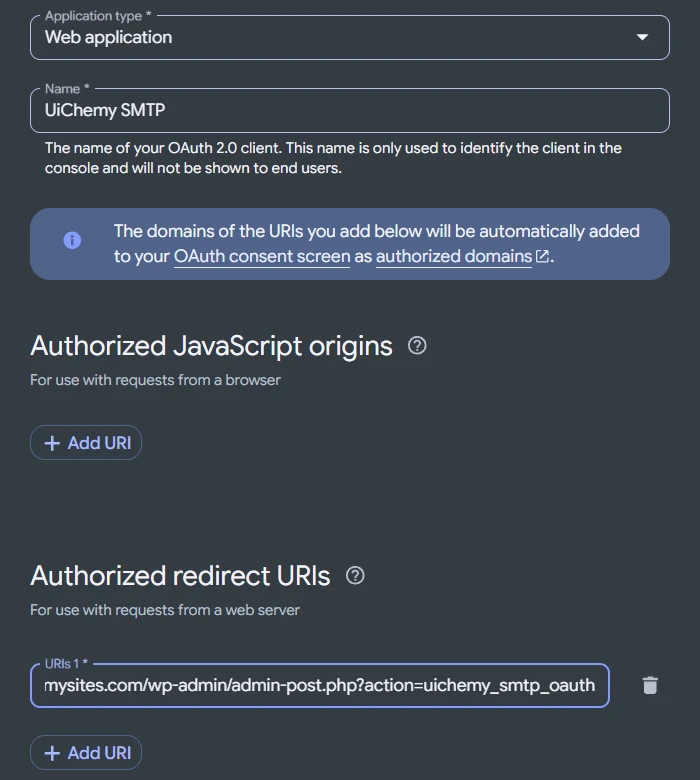
Create OAuth client ID: Web application, with the Redirect URI added
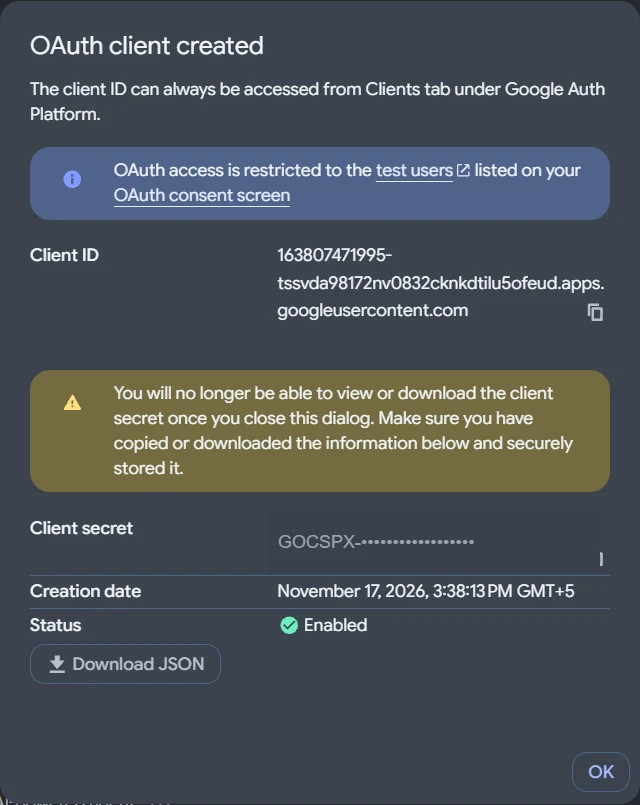
Google shows the Client ID and Client secret once
Step 4: Add Yourself as a Test User
A new External app starts in Testing. While it is in Testing, only the Google accounts you list can sign in.
Open Audience
In Google Auth Platform, open Audience.
Add the account
Under Test users, click Add users, type the Gmail address you want to send from, and click Save.
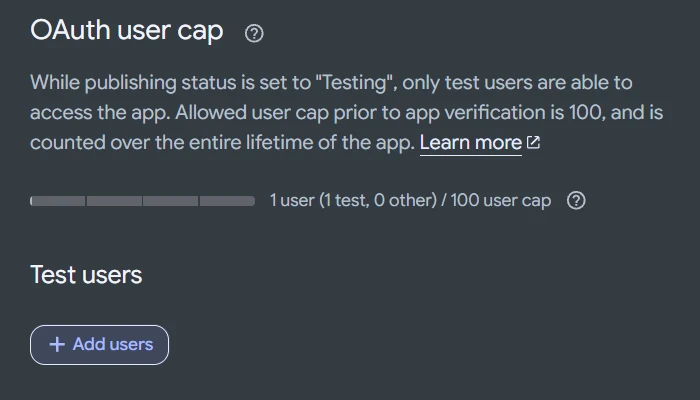
Audience → Test users, with one test user added
In our test, no extra Google API had to be switched on. The OAuth client was enough.
Step 5: Connect in UiChemy
Paste the Client ID and secret
Back in UiChemy → Settings → SMTP, paste the Client ID and the Client secret into the matching fields. Connect with Google stays disabled until both are filled in.
Connect with Google
Click Connect with Google. A window opens. If your browser blocks it, allow pop-ups for your site and try again. Choose your Google account.
Continue past the unverified app notice
Google shows Google hasn't verified this app. This is normal for your own app in Testing. It is your app, so click Continue.
Approve access
On the next screen, click Continue again. On the screen after that, tick the box for "Read, compose, send, and permanently delete all your email from Gmail", then click Continue. Gmail's SMTP sign-in needs this permission. If you leave the box empty, UiChemy cannot send.
Check the result
The window closes. Google account reads "Connected as [your address]", and the From email field fills in with it.
Save and test
Click Save changes, then send a test email under Test email.
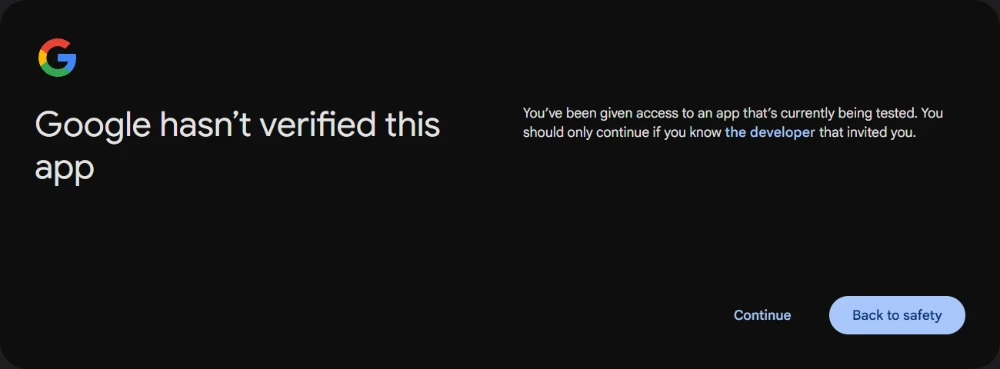
Google hasn’t verified this app: click Continue
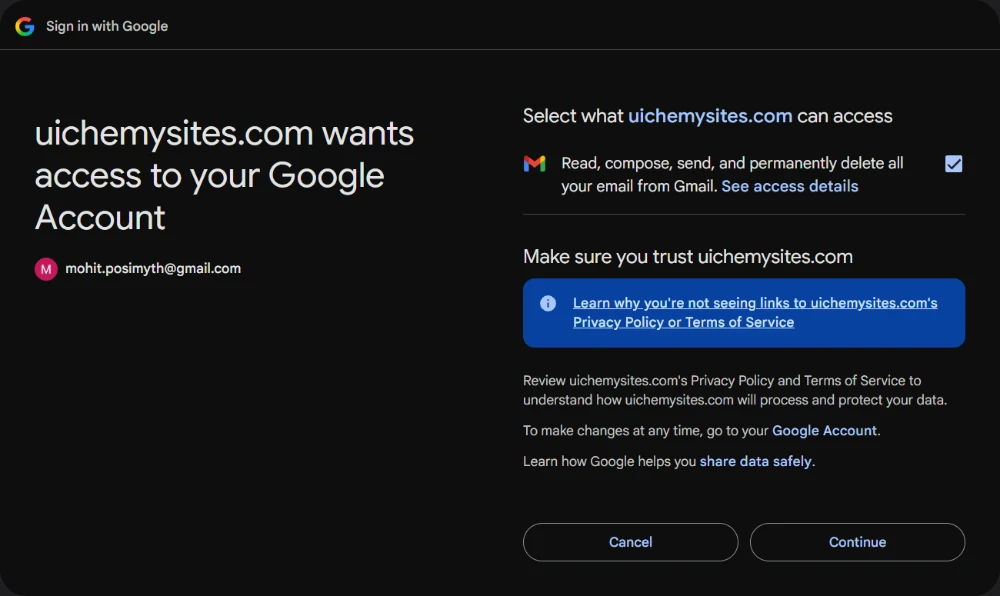
Tick the Gmail box, then click Continue
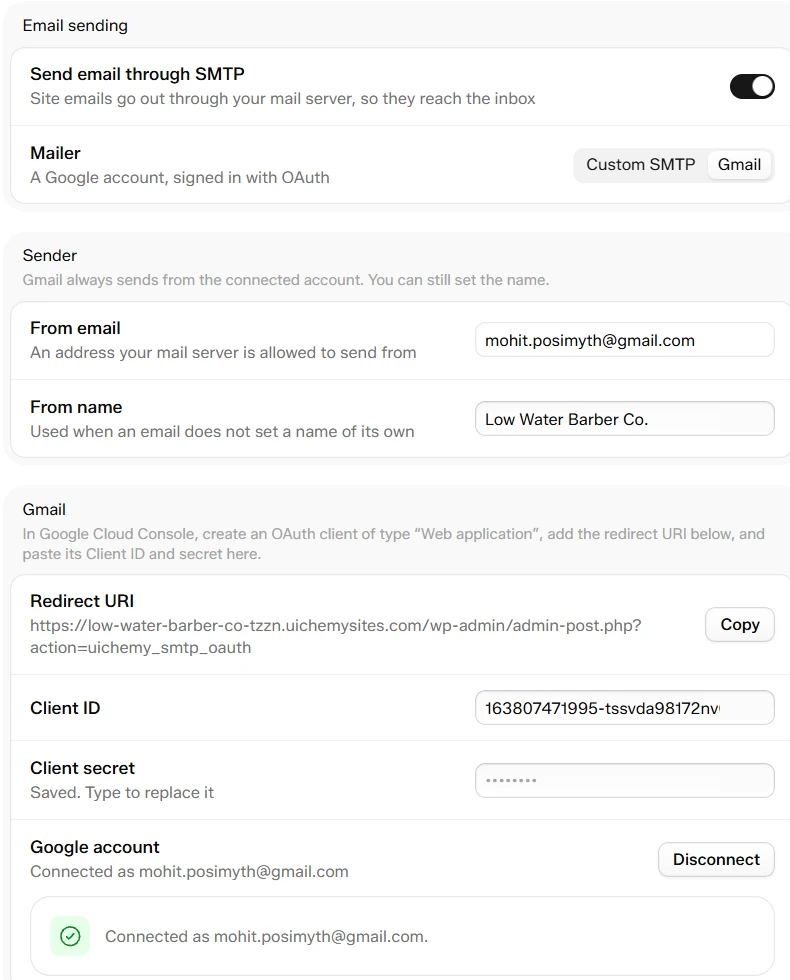
Connected as your Google account
Send a Test Email
Under Test email, type an address and click Send. The message goes out through Gmail and arrives like any other email.
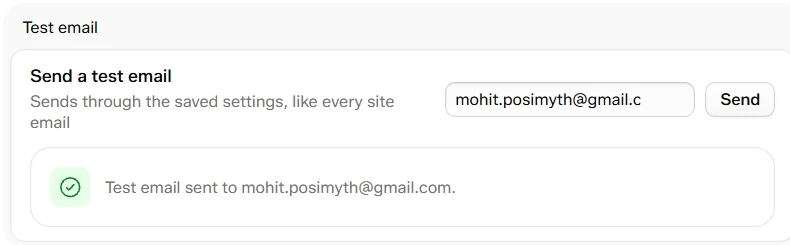
"Test email sent to" the address you entered
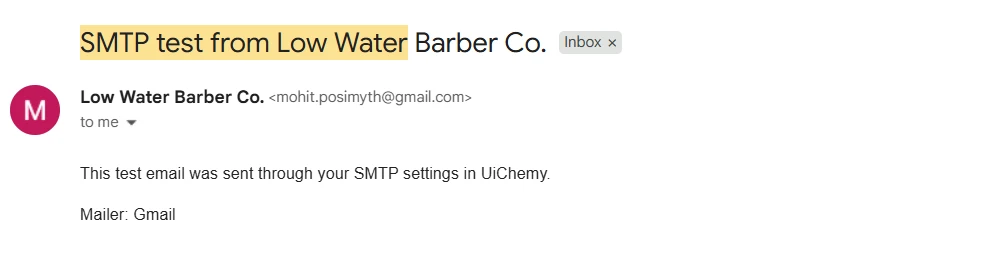
The test email in Gmail: "Mailer: Gmail"
How It Sends
UiChemy sends through smtp.gmail.com on port 587 with TLS, signed in with Google's OAuth. Gmail always sends from the connected account. From email is locked and shows the connected address. You can still set the From name.
Disconnect
Click Disconnect beside Google account. UiChemy forgets the sign-in. Emails go back to normal WordPress mail until you connect again or switch SMTP off.
Changing the Client ID
A sign-in belongs to the client that issued it. If you change the Client ID:
- The saved Client secret is cleared, and the field says "Client ID changed: enter its secret".
- The Google sign-in is dropped, so you connect again.
Google limits sign-ins for apps in Testing to about 7 days. If Gmail stops sending after a week, click Disconnect, then Connect with Google again.
If Google Sign-In Fails
| Message | What to do |
|---|---|
| "Enter the Client ID and Client secret first." | Fill in both fields before you click Connect with Google. |
| "This sign-in link has expired. Start again from the SMTP settings." | Click Connect with Google again. |
| "Google sign-in was cancelled." | You closed the window or chose not to approve. Try again. |
| "Google did not return an authorization code." or "Google did not return a token." | Check that the Redirect URI in Google matches the one on this screen exactly, then try again. |
| "Could not read the Google account's email address." | Try again, and approve the email permission. |
| Google says the app is blocked or access is denied | Add your Google account under Test users in Audience. |